Spring源码阅读环境搭建
安装 Gradle
下载压缩包
下载链接,选择 gradle-6.5.1-all .zip
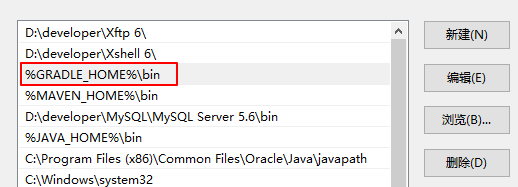
配置环境变量

并在 Path 中添加 %GRADLE_HOME%\bin
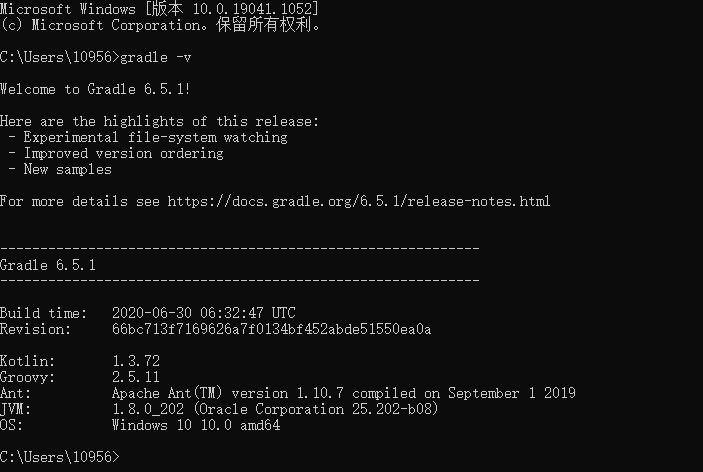
验证是否生效
Win + R 打开 cmd,输入 gradle -v 验证是否安装成功
下载源码
fork
将官方仓库的代码fork到自己的仓库
拉取代码到本地
1 | git clone https://github.com/eitan-blog/spring-framework.git |
开始构建
为源码安装对应版本的 Gradle
运行源码根目录下的 gradlew.bat 文件
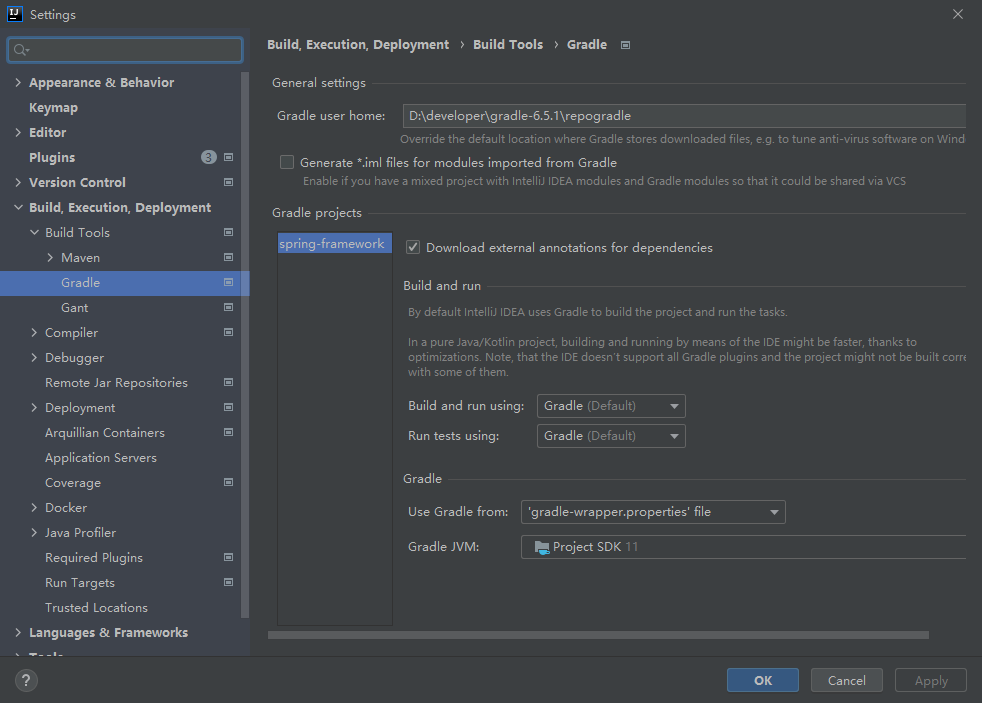
使用 IDEA 打开源码,设置 Gradle 本地仓库
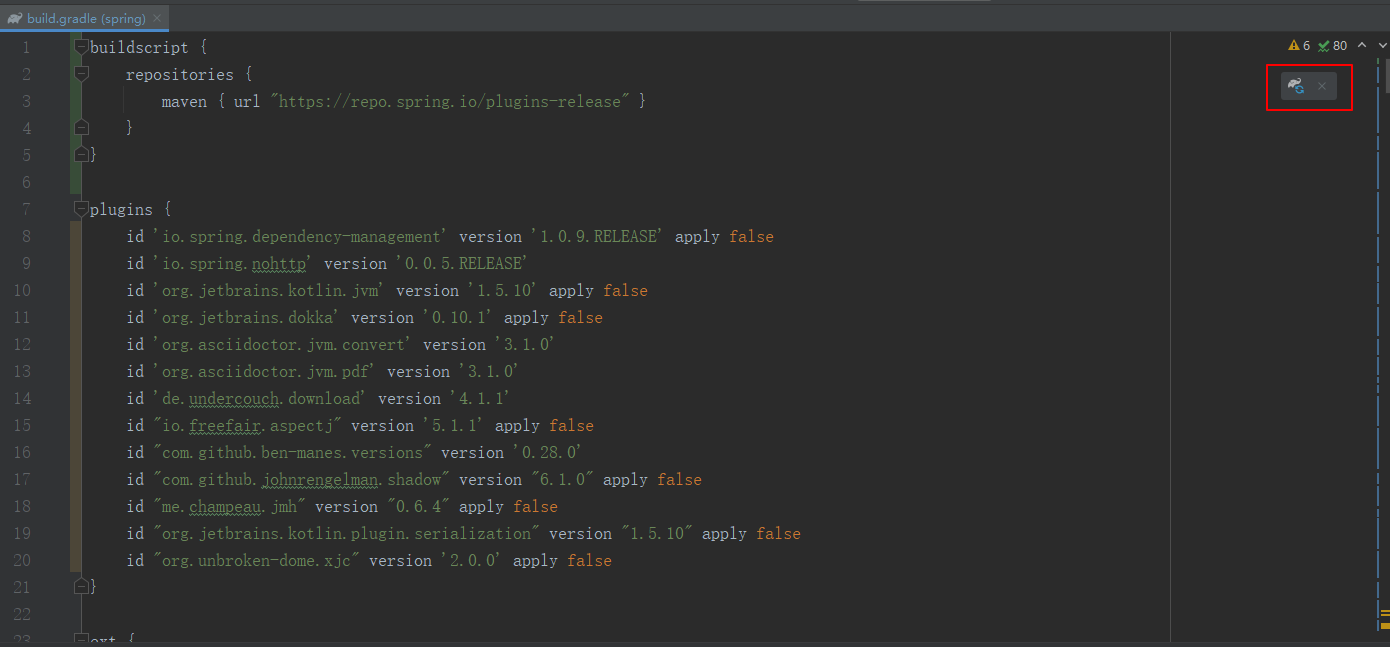
修改 build.gradle 文件
在头部添加
1
2
3
4
5
buildscript {
repositories {
maven { url "https://repo.spring.io/plugins-release" }
}
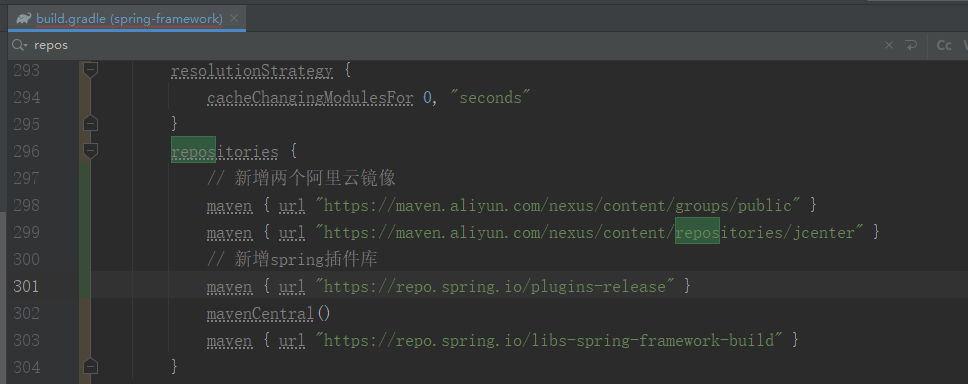
}添加镜像
1
2
3
4
5
6
7
8
9
repositories {
// 新增两个阿里云镜像
maven { url "https://maven.aliyun.com/nexus/content/groups/public" }
maven { url "https://maven.aliyun.com/nexus/content/repositories/jcenter" }
// 新增spring插件库
maven { url "https://repo.spring.io/plugins-release" }
mavenCentral()
maven { url "https://repo.spring.io/libs-spring-framework-build" }
}
构建
点击 Reload Gradle Project 按钮,将自动下载相关依赖进行项目构建。若是出现失败,有可能是网络不好,多尝试几次或者翻墙后再次尝试
验证是否构建成功
- 打开 ApplicationContext
- 按住 Ctrl + Alt + u,若能显示相关依赖说明构建成功
编译
首先编译 spring-oxm
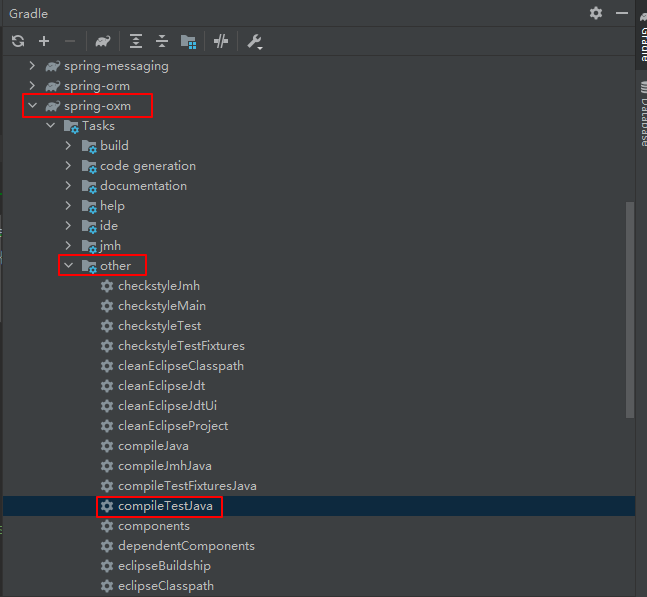
其次编译 spring-core
同样是点击 compileTestJava
编译整个项目
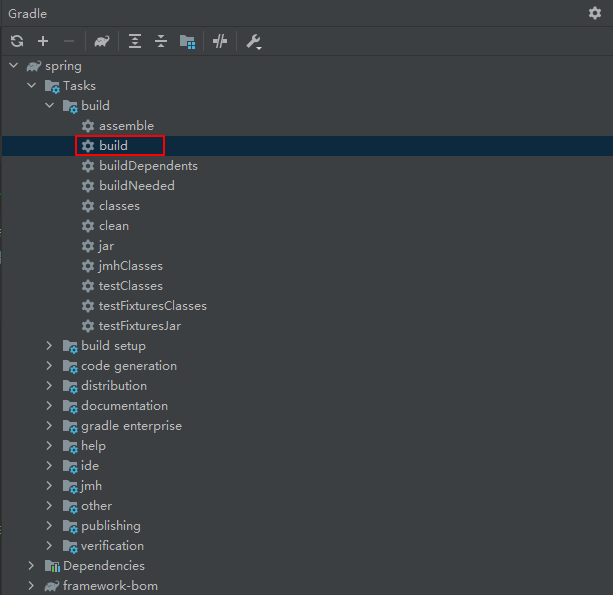
自此,spring 源码阅读环境搭建完成。